eSun eBox Lite
3DP-04-0403
Couldn't load pickup availability
Pickup currently unavailable at InkSmith Education
Related Products
Product details
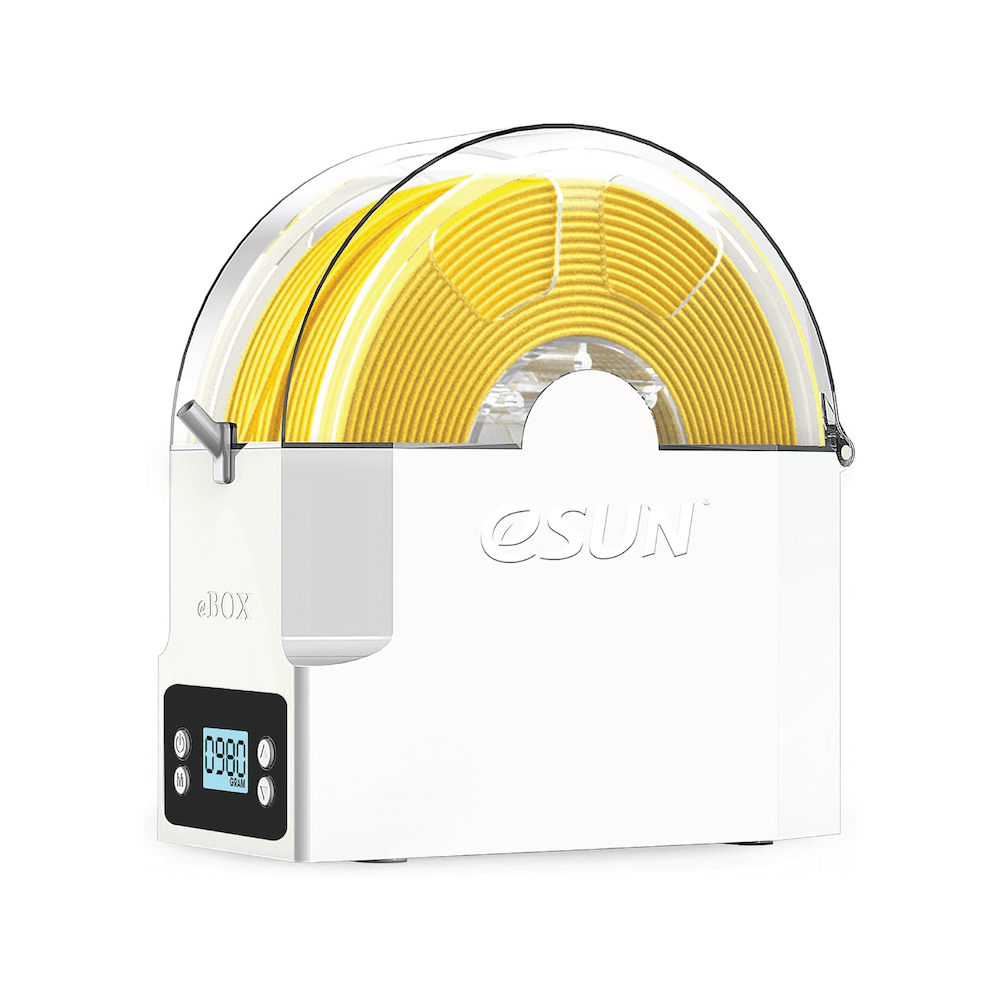
The eSun eBox Lite is a 3D printing filament storage container that allows you to maintain consistent temperature and humidity while preventing moisture and dust from negatively impacting your filament.
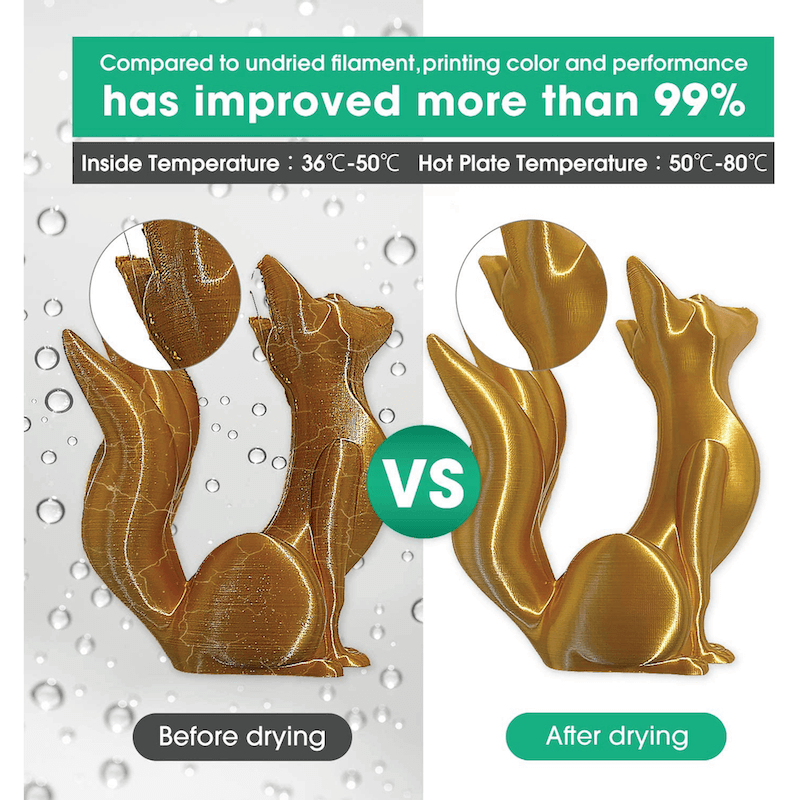
Filament naturally absorbs moisture from the air over time, and the more humid the air is, the faster this happens. The older the filament, the more moisture it has absorbed. This can result in unsuccessful prints (jams and poor bed adhesion), poorer quality prints (bubbling/warts, stringiness), and can eventually lead to unusable filament. Not only does this increase your costs over time, but it is also bad for the environment when you end up throwing out unusable filament spools.
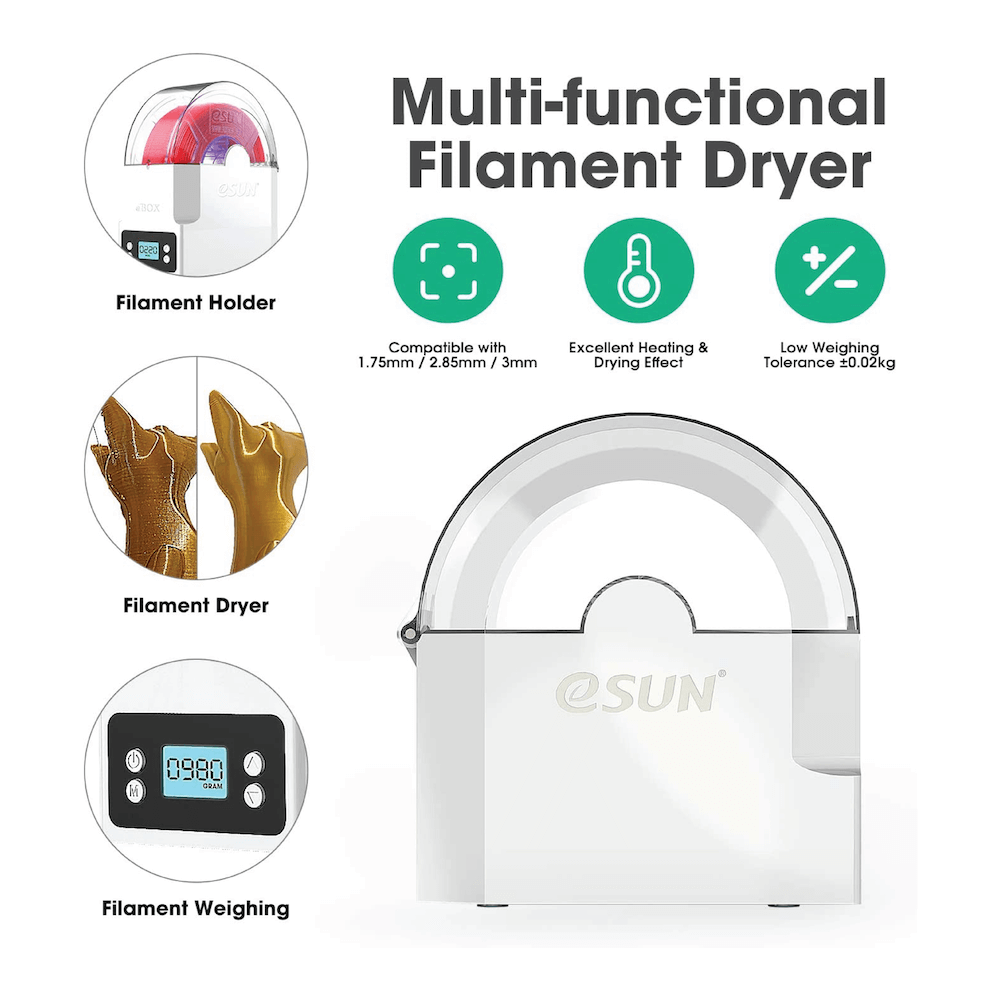
The eBox will help keep your filament dry during storage and printing using heat. It has different settings for different filaments and a timer for auto-shutoff.
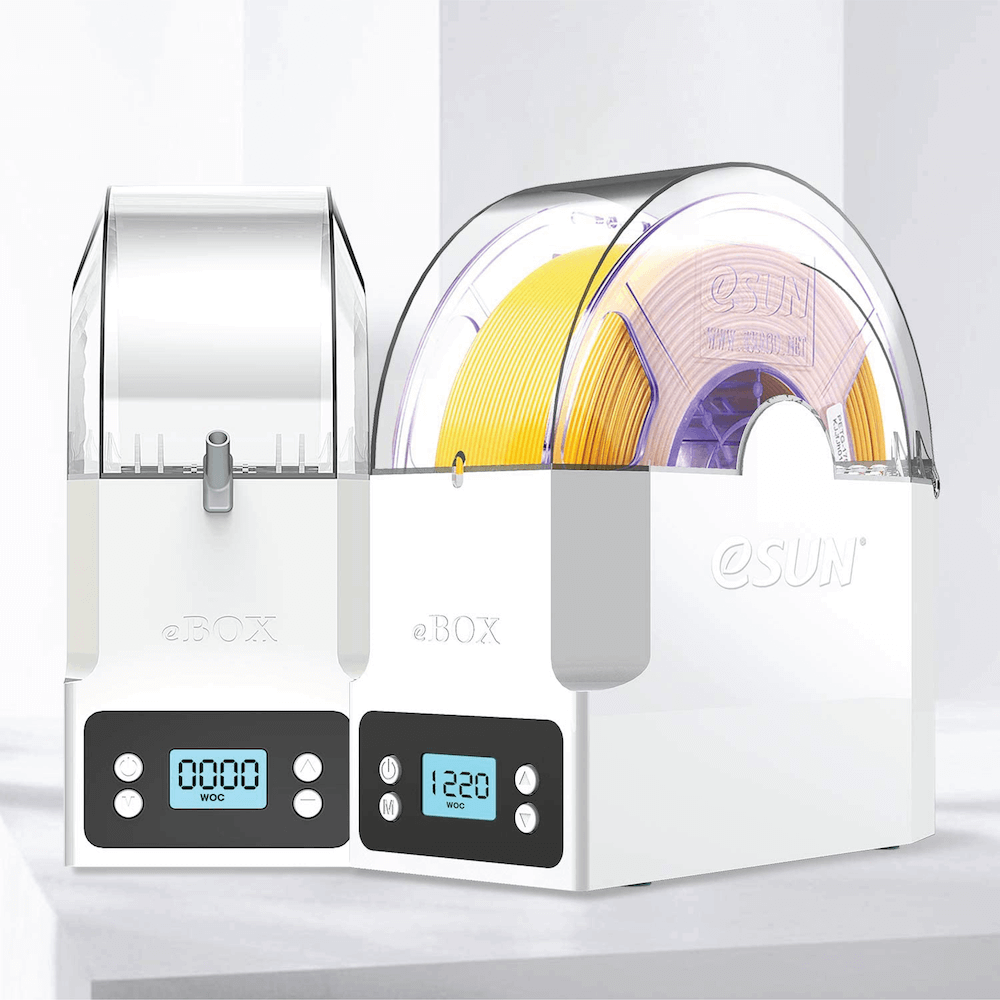
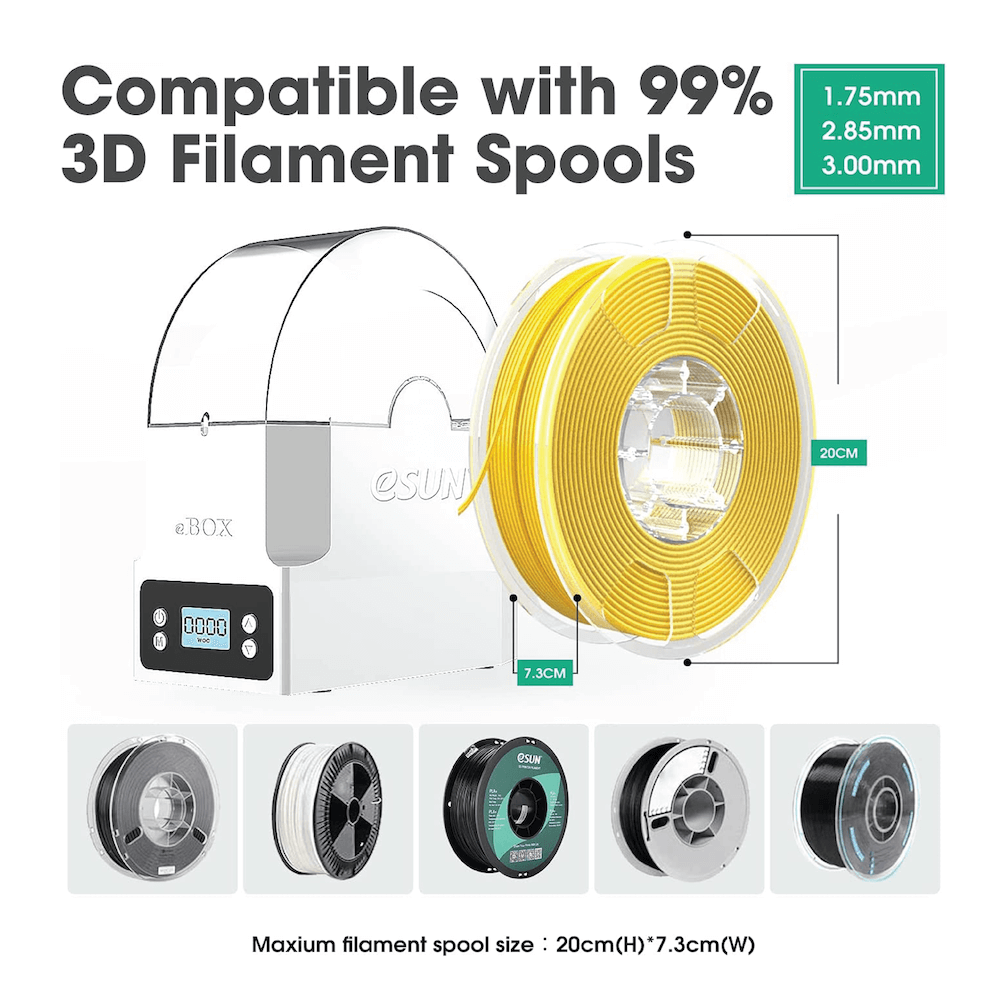
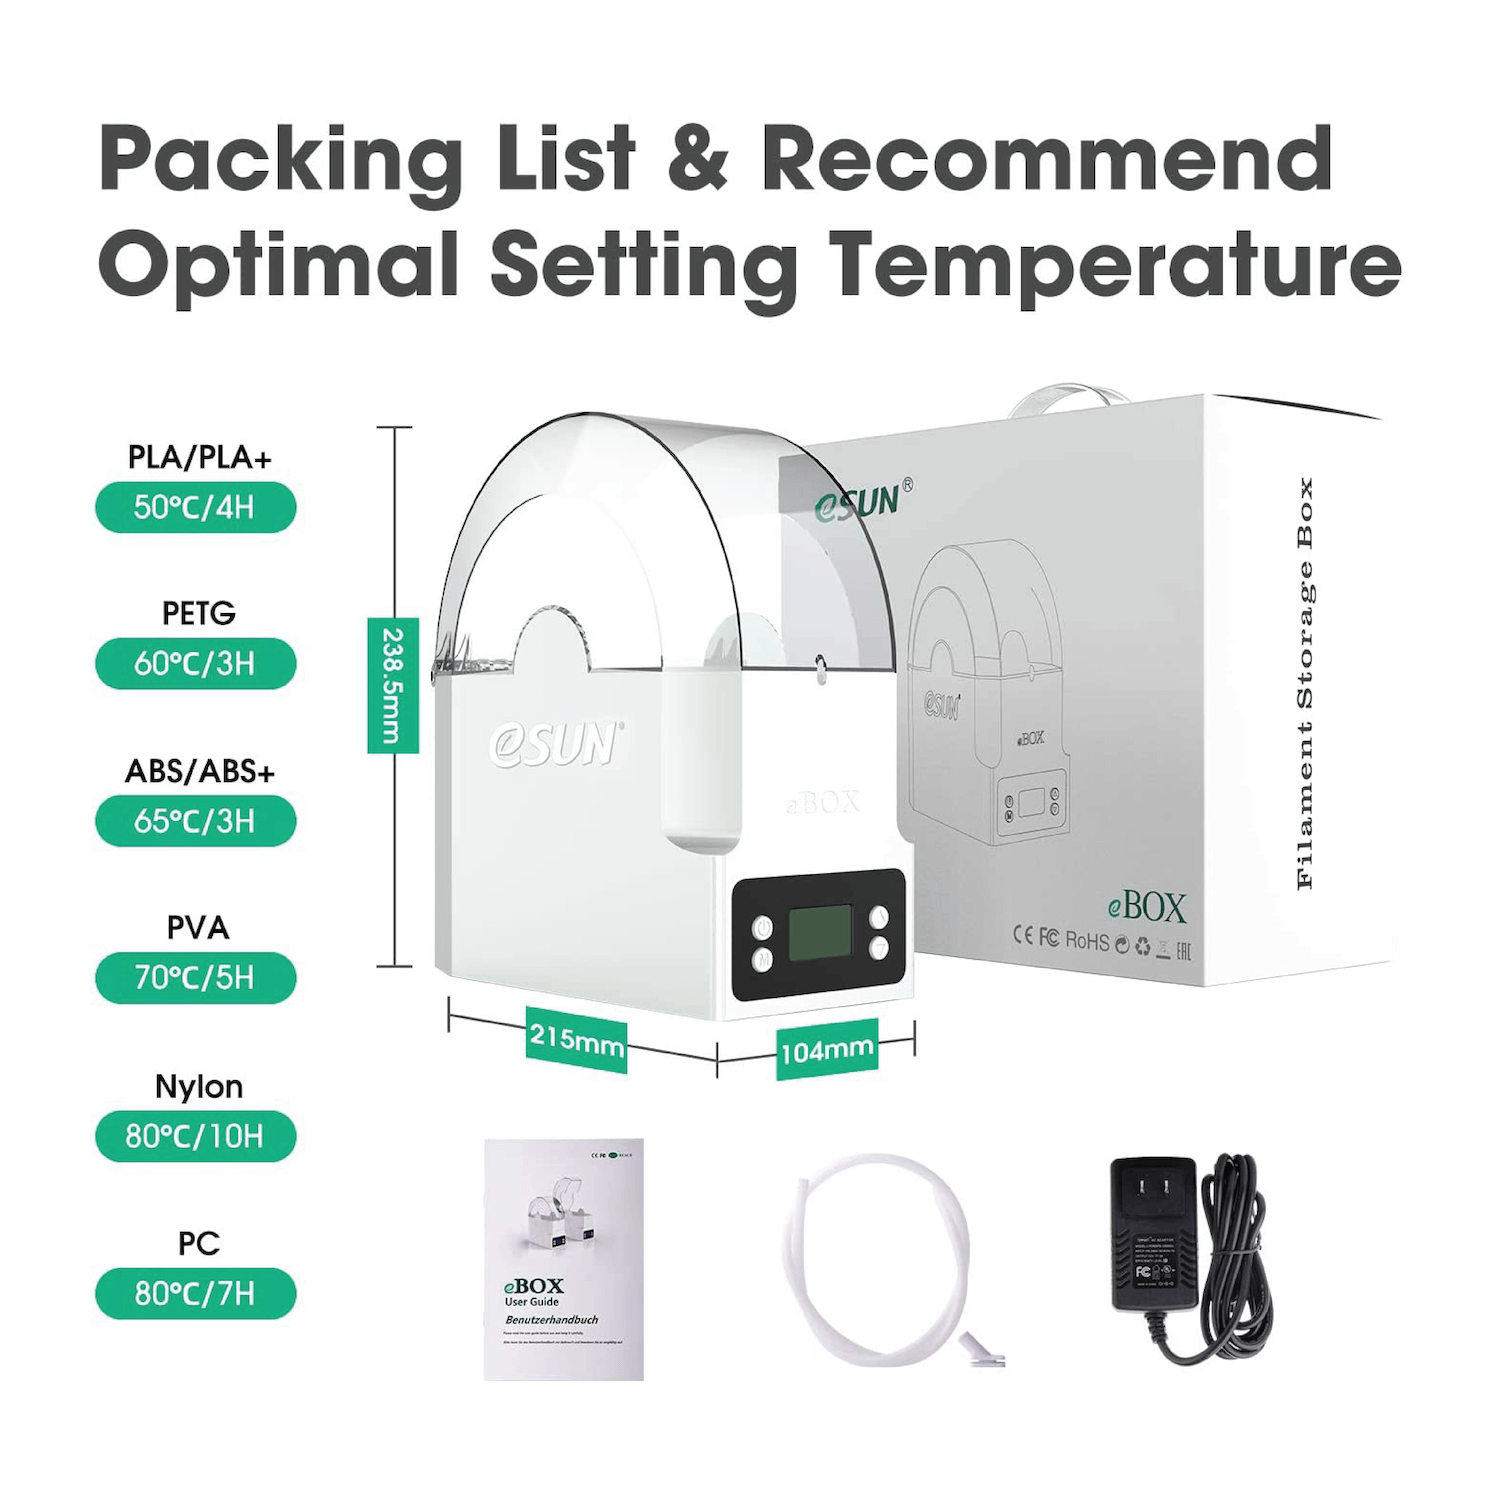
Compatible with most 0.5/1KG, 1.75/2.85mm filaments on the market such as PLA, ABS, PETG, PVA, ePA, ePA-CF, ePA-GF, PC, TPU-95A, etc.

Product Features:
- Safe Storage: Store filaments safely to prevent moisture and dust
- Ease-of-Use: Easily use the eBox as a filament stand during printing
- Uniform Heat: the arc heating piece and the sheet metal heat conduction piece allow for easy maintenance of constant temperature and humidity in the box
- Visibility: Transparent top cover allows for real-time observation of filament usage
- Safety Features: heat insulation and flame retardant insulation cotton are placed on both sides to prevent scalding
- Compatibility: Wide compatibility, compatible with most 0.5/1KG, 1.75/2.85mm filaments on the market
-
Minimal Noise: Low noise, using long-life and low-noise turbofan
Instructions for Use:
- Connect the adapter to AC100-240V~50/60Hz power supply, and insert the output end into the rear interface of the box.
- Press the key to turn on.
- Open the upper cover, put the desiccant into the empty slot at the end of the box, and put the filament spool in.
- After putting in the filament spool, pull the filament out from the outlet and close the upper cover. (The pulling direction of the filament can be from bottom to top, or top to bottom, adjusted according to different positions of the printer)

|
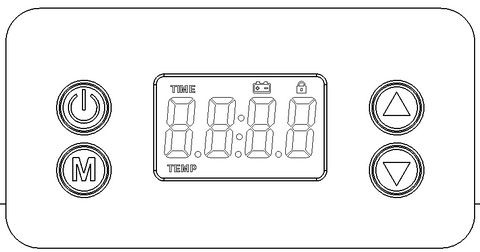 |


Parameter Settings:
- The product has a total of 4 buttons, which are on-off key, "M" function key, up key and down key.
Two modes: temperature setting mode TEMP, heating time setting TIME.
Press "M" to switch the function cyclically, and adjust the parameters with two directional keys.
By default, the system enters sleep after 5 seconds of inactivity, and the backlight disappears in sleep mode. Press any key to wake up, and then press the power button to shut down after wakeup.
- Press the function key "M" three times to switch to the temperature setting mode after power on. The screen will display TEMP. There are 3 levels in total, adjusted by the up or down key; the larger the number, the higher the temperature, and when it displays "0", it means no heating.
- Refer to the table below for specific gear setting recommendations. Set the heating temperature to the 3rd level for the highest temperature.
Level Set Reference Table
| Type of filament | PLA/PLA+ | ABS/ABS+ | PETG | PVA | Nylon | PC |
| Level | 1 | 2 | 2 | 3 | 3 | 3 |
Level Set for Temperature & Humidity Reference Table
| Level | 1 | 2 |
3 |
| Hot plate TEMP | 103℃ | 116℃ | 118℃ |
| Inside TEMP | 40℃ | 50℃ | 55℃ |
| Inside humidity | 34.2% | 23% | 15% |
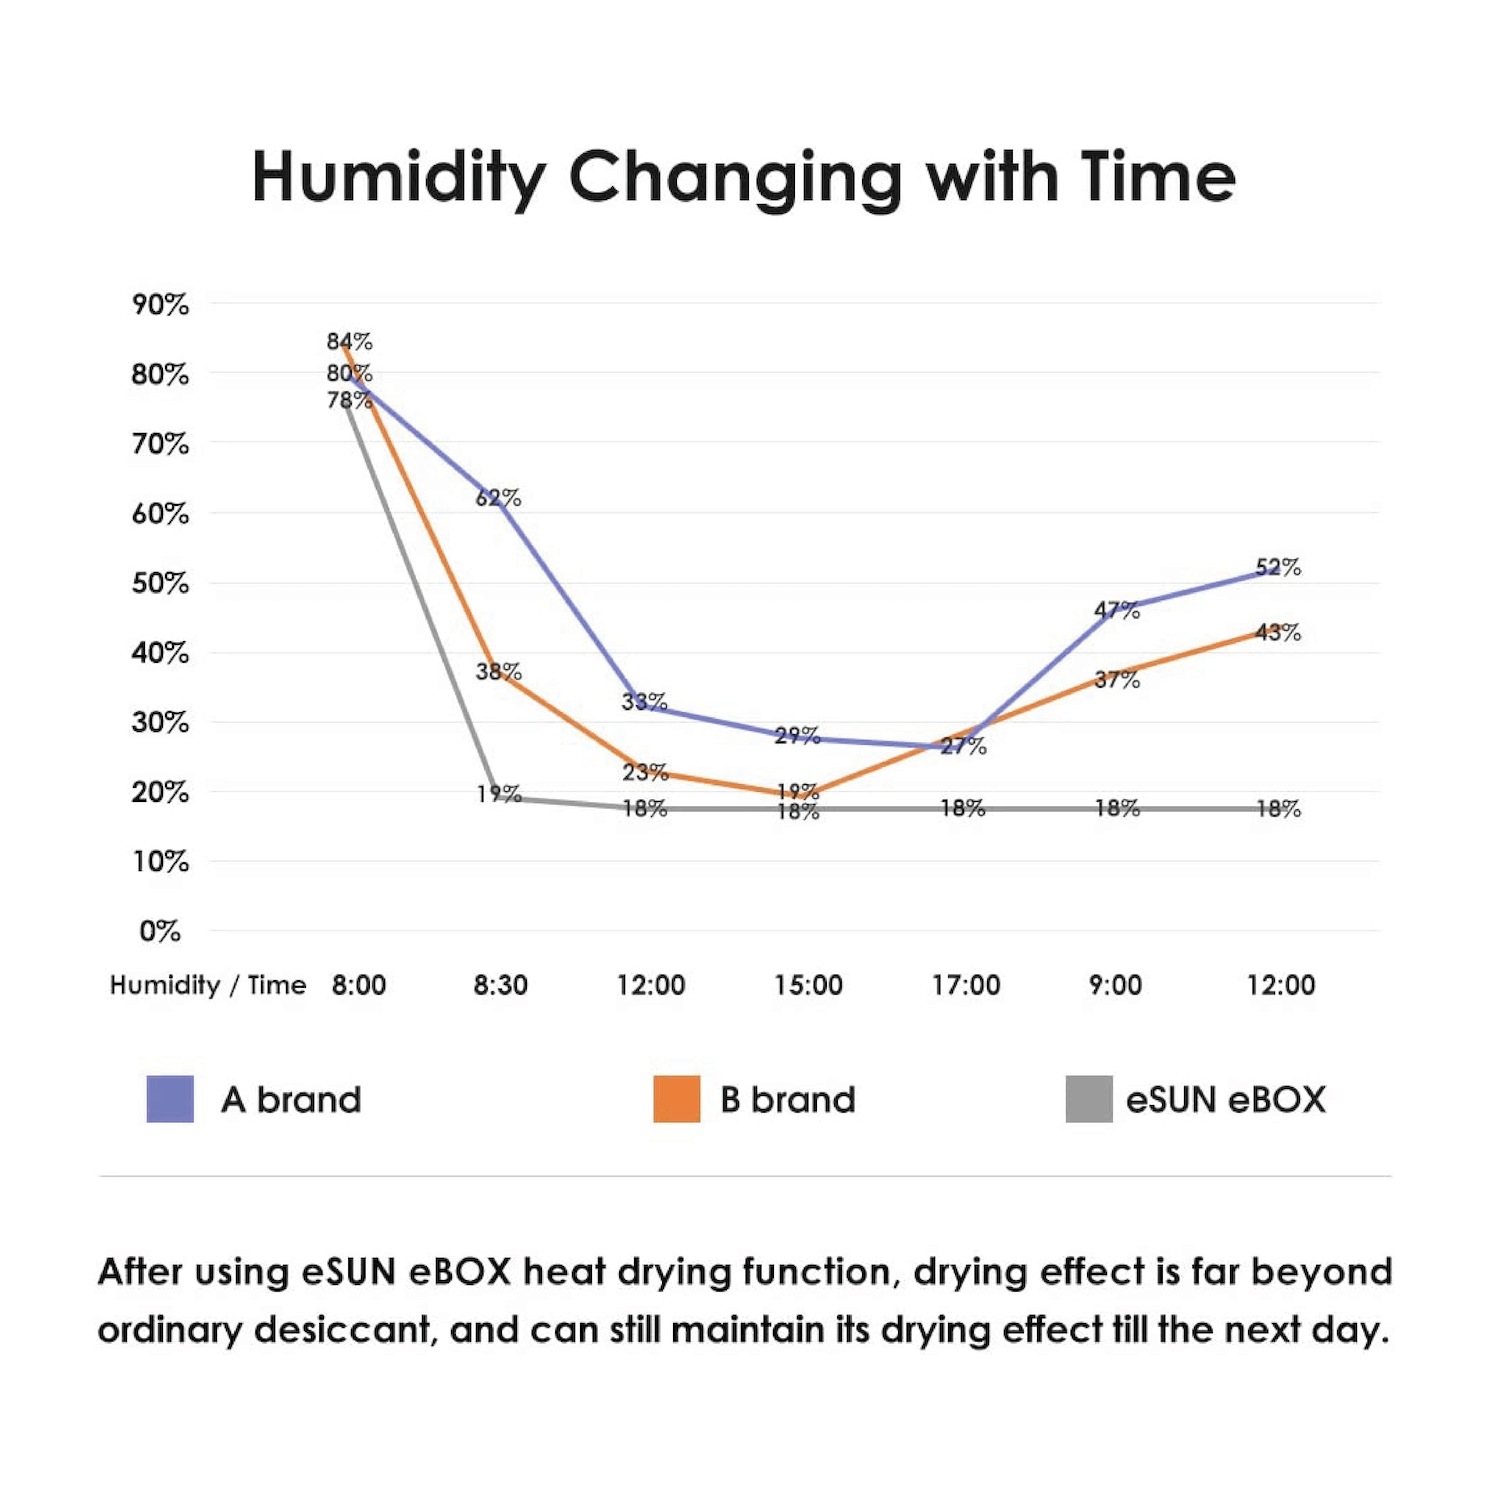
Note: The above data is tested under the conditions of indoor temperature 20℃ and humidity 55%. The temperature and humidity in the box will change slightly due to the different use environment.
Heating Time Setting Mode
- After turning on, press the function key "M" four times to switch to the heating time setting mode, the screen displays TIME, and the value displayed now is the remaining heating time in hours.
- The value displayed in TIME mode decreases as time advances, similar to a countdown.
- In TIME mode, press the up or down button to set the heating time, and each press will increase/decrease by half an hour.
If you have any questions, you are always welcome to contact us. We'll get back to you as soon as possible, within 24 hours on weekdays.
-
Shipping Information
Use this text to answer questions in as much detail as possible for your customers.
-
Customer Support
Use this text to answer questions in as much detail as possible for your customers.
-
FAQ’s
Use this text to answer questions in as much detail as possible for your customers.
-
Contact Us
Use this text to answer questions in as much detail as possible for your customers.